This article explains how to setup a Gitlab Runner inside Kubernetes, with caching and container build enabled (without insecure Docker socket exposure).
Note that you should either have a Kubernetes cluster or have followed this tutorial to create one in vagrant before.
feel free to share this article or drop a message with your feedback!
If you are a french speaker and want to learn Kubernetes, I highly recommend Stéphane Robert's website.
Install Minio in your clusters
For Gitlab to have the ability to use the S3 cache between CI steps, you will need to deploy a Minio instance. We first create a namespace:
kubectl create namespace gitlab-runner
And then, we create a minio-values.yaml file to setup the helm chart:
# your cluster domain, as for me, demo-cluster.io
clusterDomain: demo-cluster.io

# for our local use case one replica is enough
mode: standalone

# to use our volume
persistence:
  enabled: true
  accessMode: ReadWriteOnce
  size: 30Gi

resources:
  requests:
    memory: 512Mi

# to create a bucket for gitlab at startup
buckets:
  - name: "gitlab-runner"
    ## Can be one of none|download|upload|public
    policy: public
    ## Purge if bucket exists already
    purge: false

rootUser: "gitlab"
rootPassword: "gitlabrgitlabr"
And we create it:
helm repo add minio https://charts.min.io/
helm install -n gitlab-runner minio minio/minio -f minio-values.yaml
We used the default storage for your cluster. You might want to customize the persistence section
of the minio values.yaml if you prefer other storage classes than your default.
Create a Gitlab Project Runner
You first need to create a Project or Group runner on gitlab.com (or any self deployed gitlab you're using).
You will then get a runnerToken.
Then, edit the following gitlab-values.yaml file (replace your token):
runnerToken: INSERT_YOUR_TOKEN_HERE

rbac:
  create: true

gitlabUrl: https://gitlab.com

runners:
  config: |
    [[runners]]
      [runners.kubernetes]
        namespace = "{{.Release.Namespace}}"
        image = "ubuntu:16.04"
        privileged = true
      [runners.cache]
        Type = "s3"
        [runners.cache.s3]
          ServerAddress = "minio:9000"
          BucketName = "gitlab-runner"
          AccessKey = "gitlab"
          SecretKey = "gitlabrgitlabr"
          Insecure = true
Outside of a local test cluster, you should set the Insecure flag to false as it basically gives root access on your server to any ci script through the docker socket. If you do so, you might run into the following issue if building containers with podman or buildah:
fuse: device not found, try 'modprobe fuse' first
fuse-overlayfs: cannot mount: No such file or directory
: exit status 1
Then three options are available:
- Using VFS
STORAGE_DRIVER, by addingenvironment = ["STORAGE_DRIVER=vfs"]to the TOML Gitlab Runner config template, but it's slow and can use ridiculously high storage space. - Setting all the permissions and capabilities for containerd to avoid that error like here. This may take some time to get everything setup right.
- Using a permissionless container build tool like Kaniko, which I strongly encourage!
Finally, create the runner:
helm repo add gitlab https://charts.gitlab.io
helm install -n gitlab-runner gitlab-runner gitlab/gitlab-runner -f gitlab-values.yaml
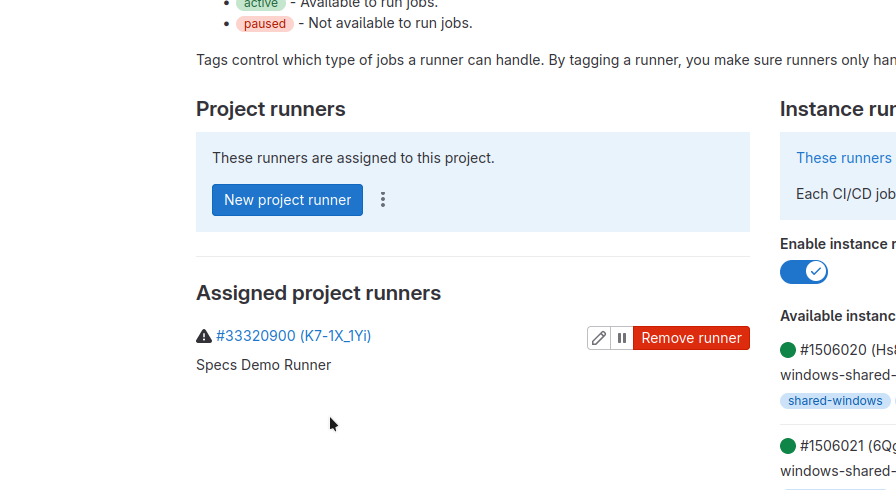
You should now see the runner appear the following way in the gitlab project runner list:

Spread the word
If you liked this article, feel free to share it on LinkedIn, send it to your friends, or review it. It really make it worth my time to have a larger audience, and it encourages me to share more tips and tricks. You are also welcome to report any error, share your feedback or drop a message to say hi!